શું તમે જાણો છો કે Pradhan Mantri Jan Dhan Yojana દ્વારા તમે મફતમાં બેંક ખાતું ખોલી શકો છો? જાનો આ યોજનાના ફાયદા, લાભો અને કેવી રીતે ખાતું ખોલવું તેની સંપૂર્ણ માહિતી. આર્ટિકલ વાંચીને આજે જ લો તમારો લાભ!
Pradhan Mantri Jan Dhan Yojana
એક સમય હતો જ્યારે બેંક ખાતું ખોલવું એ એક ભારે ભરણપાટુ કામ ગણાતું. ઘણા દસ્તાવેજો, ભરપાઈ… એટલી તકલીફ જોઈને લોકો પૈસા ઘરે જ રાખવાનું પસંદ કરતા. પણ ૨૦૧૪માં ભારત સરકારે એક અભિયાન શરૂ કર્યું જેણે આ તસવીર જ બદલી નાખી. તે અભિયાનનું નામ છે Pradhan Mantri Jan Dhan Yojana (PMJDY). આ યોજનાએ દેશના કોઈપણ નાગરિક માટે બેંક ખાતું ખોલવાના દરવાજા સરળતાથી ખોલી દીધા. ચાલો, આજે આપણે આ જન-કલ્યાણકારી યોજના અંગે વિગતવાર જાણીએ.
| અંગ | મુખ્ય માહિતી |
|---|---|
| યોજનાનું નામ | પ્રધાનમંત્રી જન ધન યોજના (PMJDY) |
| શરૂઆત | ૨૮ ઑગસ્ટ, ૨૦૧૪ |
| મુખ્ય લક્ષ્ય | દરેક પરિવારને બેંકિંગ સુવિધા પૂરી પાડવી |
| મુખ્ય લાભ | મફત બેંક ખાતું, રુપે ડેબિટ કાર્ડ, વિપત્તિ બીમા |
પ્રધાનમંત્રી જન ધન યોજના શું છે?
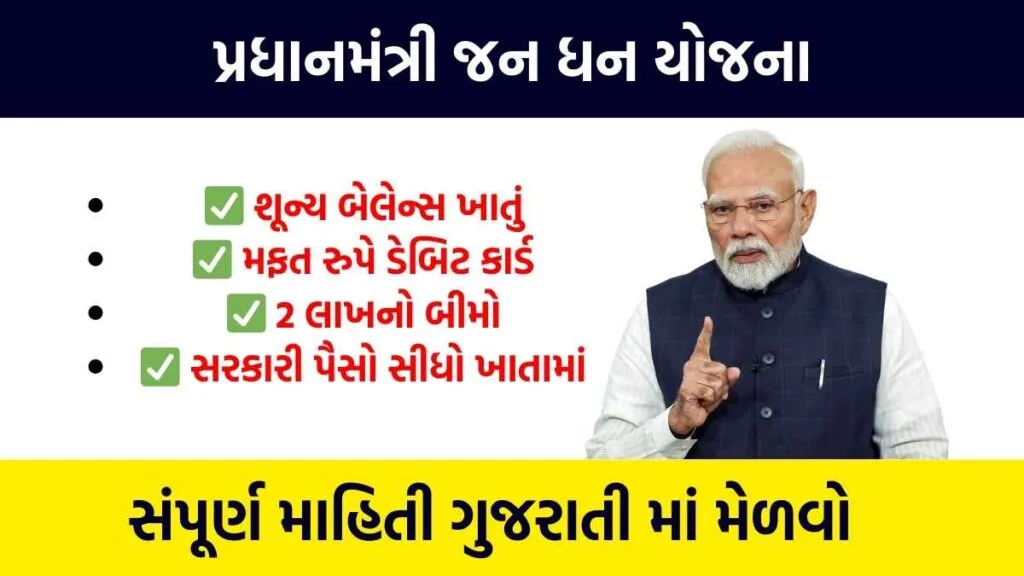
સરળ શબ્દોમાં કહીએ તો, Pradhan Mantri Jan Dhan Yojana એ ભારત સરકારની એક ધ્વજપ્રય યોજના છે જેનો મુખ્ય હેતુ દેશના ગરીબ અને વંચિત વર્ગના લોકોને મુખ્ય ધારાની બેંકિંગ સેવાઓ સાથે જોડવાનો છે. આ યોજના હેઠળ કોઈપણ વ્યક્તિ ખૂબ જ સરળતાથી શૂન્ય શેલ્ક (શૂન્ય બેલેન્સ) સાથે બેંક ખાતું ખોલી શકે છે. આનો અર્થ એ છે કે તમારે ખાતું ચલાવવા માટે ન્યૂનતમ રકમ રાખવાની કોઈ જરૂર નથી. આ યોજના ના ફાયદા ઘણા વ્યાપક છે અને આપણે આગળ તે જોઈશું.
આ યોજનાના મુખ્ય ફાયદા અને સુવિધાઓ
Pradhan Mantri Jan Dhan Yojana સાથે જોડાયેલ લોકોને નીચેની મુખ્ય સુવિધાઓ મળે છે:
- મફત બેંક ખાતું: ખાતું ખોલવું અને તેને ચલાવવું એ બંને મફત છે. કોઈ ચાર્જ લાગતો નથી.
- રુપે ડેબિટ કાર્ડ: ખાતું ખોલતી વખતે જ તમને એક રુપે ડેબિટ કાર્ડ મળે છે. આ કાર્ડનો ઉપયોગ તમે ખરીદી કરવા અને પૈસા કાઢવા માટે કરી શકો છો.
- વિપત્તિ બીમા: ખાતા ધારકને સ્વયંચાલિત રીતે ૨ લાખ રૂપિયાનો વિપત્તિઆવરી બીમા (Accident Insurance Cover) મળે છે.
- ઓવરડ્રાફ્ટ સુવિધા: જો તમારું ખાતું સક્રિય છે અને તમે નિયમિત ચલાવો છો, તો તમે ૧૦,૦૦૦ રૂપિયા સુધીની ઓવરડ્રાફ્ટ (ઉધાર) સુવિધા પણ મેળવી શકો છો.
- સરકારી લાભનું સીધું હસ્તાંતરણ: સરકારની તમામ યોજનાઓનો લાભ, જેમ કે ઉપજ સહાય, પેન્શન, વગેરે સીધા આ ખાતામાં જમા થાય છે. આથી ભ્રષ્ટાચાર અટકે છે અને પૈસા સીધા લાભાર્થીને મળે છે.
તમારું જન ધન ખાતું કેવી રીતે ખોલશો?
Pradhan Mantri Jan Dhan Yojana હેઠળ ખાતું ખોલવાની પ્રક્રિયા ખૂબ જ સરળ છે. તમારે ફક્ત નીચેના પગલાં અનુસરવાના છે:
- તમારા નજીકની કોઈપણ બેંકની શાખામાં જાવ. (રાષ્ટ્રીયકૃત બેંક, ખાનગી બેંક, અથવા ગ્રામીણ બેંક)
- બેંકના અધિકારીને Pradhan Mantri Jan Dhan Yojana હેઠળ ખાતું ખોલવાની ઇચ્છા જણાવો.
- તમારી ઓળખ અને સરનામાના પુરાવા તરીકે આધાર કાર્ડ સાથે જવું જોઈએ. આધાર કાર્ડ એ જરૂરી અને પૂરતો દસ્તાવેજ છે.
- બેંક તરફથી આપવામાં આવેલ ફોર્મ ભરો અને જરૂરી માહિતી આપો.
- ફોર્મ અને દસ્તાવેજો સબમિટ કર્યા પછી, તમારું ખાતું તુરંત જ ખોલી આપવામાં આવશે.
તેની સાથે જ તમને તમારા ખાતાની પાસબુક અને રુપે ડેબિટ કાર્ડ પણ મળી જશે.
નિષ્કર્ષ: સશક્તિકરણનો એક માર્ગ
Pradhan Mantri Jan Dhan Yojana એ માત્ર એક બેંક ખાતું ખોલવાની યોજના નથી, પણ તે દેશના ગરીબ નાગરિકોને આર્થિક રીતે સશક્ત બનાવવાનો એક મજબૂત માર્ગ છે. આ યોજનાએ કરોડો લોકોને બેંકિંગ સિસ્ટમનો ભાગ બનાવ્યા છે, જેથી તેમની બચત સુરક્ષિત થઈ છે અને સરકારી લાભ સીધા તેમના હાથમાં પહોંચ્યા છે. જો તમારા કુટુંબમાં કોઈ સભ્યનું હજી સુધી બેંક ખાતું નથી, તો આ એક સુવર્ણ તક છે. Pradhan Mantri Jan Dhan Yojana ના માધ્યમથી તેમને આર્થિક મુખ્યધારા સાથે જોડો અને સુરક્ષિત ભવિષ્યના પગલે લઈ જાવ.
FAQS
1. PMJDY શું છે?
બેંક ખાતું, ડેબિટ કાર્ડ અને બીમા સહિતની મૂળભૂત બેંકિંગ સુવિધા પૂરી પાડતી ભારત સરકારની યોજના.
2. ખાતું ખોલવા શું જોઈએ?
ફક્ત આધાર કાર્ડ જ જરૂરી છે. ખાતું ખોલવા અને ચલાવવું મફત છે.
3. ઓવરડ્રાફ્ટ સુવિધા મળે?
હા, યોગ્ય ખાતાઓને રુ. 10,000 સુધીની ઓવરડ્રાફ્ટ સુવિધા મળી શકે છે.